Add a Raspberry Pi to the Roomba
I have a Roomba 530 with a serial interface and open API as specified
here.
Connecting the pi requires a serial connection between the pi an the
roomba's serial port, and some way of powering the pi from the 18volt
supply on the roomba.
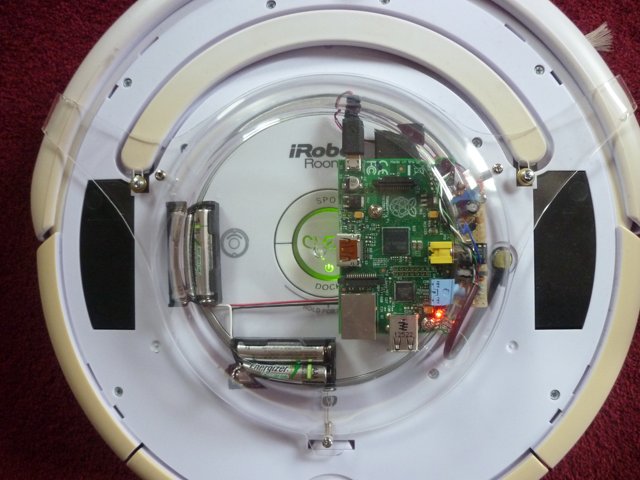
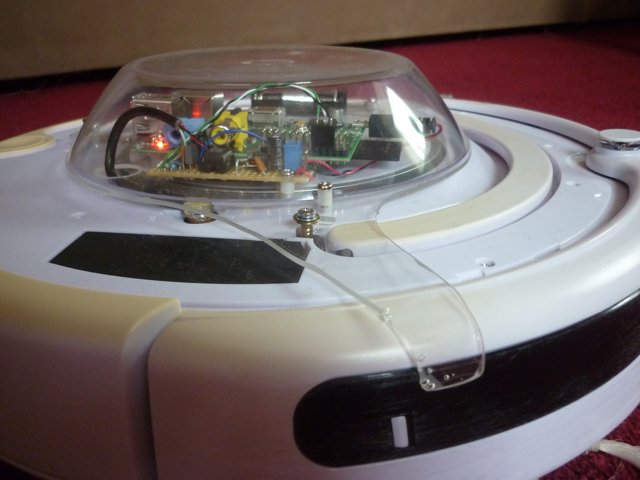
I have put the pi in a plastic case that is connected to the bumper.
That way when it goes under a chair and catches the case, the force is
transmitted to the bump sensors and the standard software figures out
what to do.
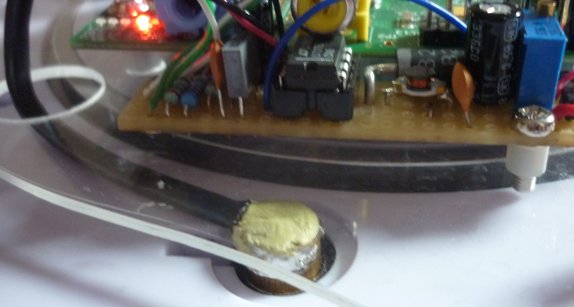 Unfortunately the clear plastic bowl I could get to cut
down was slightly too small and so I ended up making a 7 pin DIN plug
out of a piece of brass tube, some bass wire and some epoxy putty from
the local hobby shop. The process was to solder the wires onto the
pins, take the battery out of the Roomba and put vaseline on the
serial plug on the Roomba. Put the pins (and earth ring) in the Roomba
socket, and then push putty over the top of the pins. When it
dries, take the plug out (carefully) and "back fill" the plug from the
pin side and push it back into its vaseline covered socket. Let it
dry and clean up.
Unfortunately the clear plastic bowl I could get to cut
down was slightly too small and so I ended up making a 7 pin DIN plug
out of a piece of brass tube, some bass wire and some epoxy putty from
the local hobby shop. The process was to solder the wires onto the
pins, take the battery out of the Roomba and put vaseline on the
serial plug on the Roomba. Put the pins (and earth ring) in the Roomba
socket, and then push putty over the top of the pins. When it
dries, take the plug out (carefully) and "back fill" the plug from the
pin side and push it back into its vaseline covered socket. Let it
dry and clean up.
 There are two electrical challenges. First the serial interface to
the rpi is 3.3v and the serial interface to the Roomba is 5v. To
address this I simply used a voltage divider on the Roomba TxD to rpi
RxD connection (see circuit below). The rpi TxD to Roomba RxD
connection is fine as 3.3v seems to be enough to drive the Roomba RxD
signal.
There are two electrical challenges. First the serial interface to
the rpi is 3.3v and the serial interface to the Roomba is 5v. To
address this I simply used a voltage divider on the Roomba TxD to rpi
RxD connection (see circuit below). The rpi TxD to Roomba RxD
connection is fine as 3.3v seems to be enough to drive the Roomba RxD
signal.
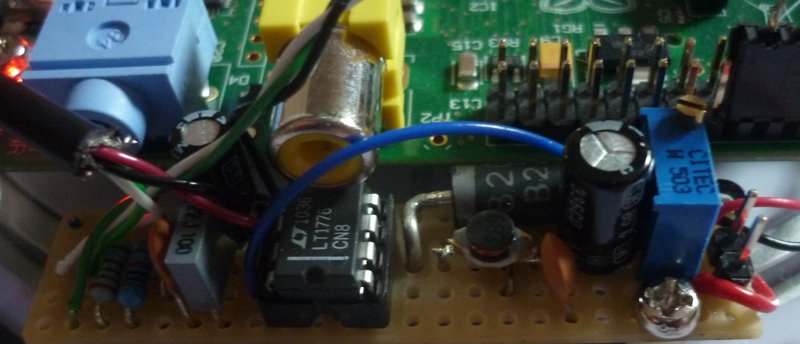
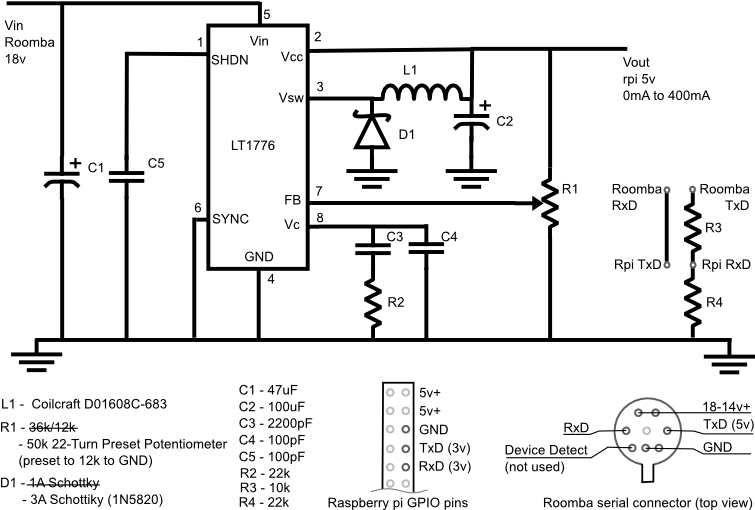 The second challenge is that, although there 18-14v available directly
from the Roomba battery via the serial plug, there is a 200mA poly
fuse on that supply and the Roomba draws up to 700mA. It actually only
draws 330 mA when running but round 420 on boot. The difference
between what it normally draws and the specified required current is
to drive things hanging off the USB ports. The solution was to use a
DC to DC converter (available through Farnell in the UK) that would
provide 400mA. This turns out to be enough to boot and so my 4
rechargeable batteries are redundant until I put something weighty on
the USB connections. Here is the circuit I used - there are some
strange choices (the inductor is surface mount; the schottiky diode is
too big ...) but these decisions were based on what I had and could
get. The original idea was to tune the potentiometer to deliver a
trickle charge (via a current regulator) to the batteries and have the
the power to the pi go via a voltage regulator. This doesn't work as I
don't seem to be able to find a voltage regulator that will take 5.45v
down to between 4.8 and 5.2 volts. Please mail me if you have any
suggestions.
The second challenge is that, although there 18-14v available directly
from the Roomba battery via the serial plug, there is a 200mA poly
fuse on that supply and the Roomba draws up to 700mA. It actually only
draws 330 mA when running but round 420 on boot. The difference
between what it normally draws and the specified required current is
to drive things hanging off the USB ports. The solution was to use a
DC to DC converter (available through Farnell in the UK) that would
provide 400mA. This turns out to be enough to boot and so my 4
rechargeable batteries are redundant until I put something weighty on
the USB connections. Here is the circuit I used - there are some
strange choices (the inductor is surface mount; the schottiky diode is
too big ...) but these decisions were based on what I had and could
get. The original idea was to tune the potentiometer to deliver a
trickle charge (via a current regulator) to the batteries and have the
the power to the pi go via a voltage regulator. This doesn't work as I
don't seem to be able to find a voltage regulator that will take 5.45v
down to between 4.8 and 5.2 volts. Please mail me if you have any
suggestions.
Finally the code. I have written (most) of the Roomba Open Interface
as a Java package that uses RXTX behind the scenes to communicate with
the robot. In addition I have written a user interface that provides
a "joystick" to steer the roomba, and a set of level meters that indicate
the output from the 6 "light bump sensors":

The code is in Java and uses Sockets to communicate between a computer
running the user interface and the rpi, and RXTX to communicate
between the rpi and the roomba.
The code is available for download here as a tar ball.
back to Peter's home page